Tuesday, 26 April 2016

Happily ever after

Previously on: I was unimpressed with the waist-level bulge on my McCalls 7091 dress. The prime suspect was the significant amount of gathering in the underskirt, but was that the real culprit...?

My first attempt at restructuring this dress was to re-cut the three-panel underskirt into twelve panels the same shape as the panels in the overskirt. I thought that removing the gathering would solve the problem. I did not have much spare pink fabric, so I had to cut the new pieces from the already cut pink skirt. There was insufficient depth so I had to make the tops of each new panel out of the black fabric (this will be important later).
So I sewed and pressed the dozens of new seams and carefully clipped the horizontal seam allowances to remove every scrap of unnecessary bulk... and it hardly made a difference. There was still a lot of fabric at the waist. So I unpicked the pink skirt, again, and took in all the seams on the black panels so it fitted me much more closely.  Then I gathered the pink onto the black extension pieces. Success!
The lining kept wanting to slip sideways so I hand sewed the outer layer to the lining at the front and side seams. This has the added benefit of smoothing out the edges of the silhouette.


And so what we have learnt...
  •  I think the main problem here was a fitting issue. Between starting and finishing this dress I have learned a bit more about how to fit clothes and I think I need to make it standard practice to lengthen waistlines by about an inch as the first thing I do with a pattern. I do think extending the lining so the gathering is lower is a good idea, but the outer layer needs to be close-fitted lower as well.
  •  I kind of regret cutting the pink as part of the first fix; it has too many seam lines now. It folds more nicely than it did, probably because it's gathered on to a smaller circumference, making more folds. The fabric still might be too stiff, but I like it so that doesn't count. :-)
  • I learned that while zips need to be longer in dresses that have fitted skirts they can be shorter in dresses with full skirts. I'd had difficulty finding zips long enough to get my 40s dresses on easily, so for this dress I bought the longest invisible zip I could find. It is way too long. I hadn't thought about the difference skirt shape makes. The skirt on this dress is at least a full circle. The extra zip length bulges weirdly so I might go back and cut it off.  
I wore the dress to work last week and spent the whole day feeling fabulous, so it has all turned out well in the end.


Sunday, 10 April 2016

I will not call this post Winter is Coming. I will not...

Did I say last year that I wanted to do some stashbusting this year? *checks blog* I did. Well, in a shocking and unlikely turn of events I have actually done some. We had a cold snap a few weeks ago and I was nearly too cold to move (in house temperatures ranged between 17 and a remarkably chilly 24 – it wasn't that cold, but my body doesn't understand the concept of producing heat). I missed my justacorps* terribly.
Back in high school I was bit obsessed with the justacorps. I made one (in magenta corduroy) from Simplicity 3677 but later adapted the pattern to be historical based on this pattern from Maurice Leloir's Histoire du Costume and made a new one out of highly unhistorical polar fleece and three big plastic buttons.
This coat was very cosy indoors (but the wind went straight through it so wasn't great for outside) and was my warm winter coat for several years (and no-one ever recognised it as a pirate coat). Sadly both justacorps are now worn out and have been relegated to the dress up box.

So, back in the cold near-present, I decided to make a new fleecy coat. I had already bought and mocked up McCalls 7025 so that seemed like a good idea. Making it properly would also give me a chance to try following the instructions and test it a bit more thoroughly.
The colours were determined by what fleece was in the stash. I had a fair bit of blue left over from the justacorps and the pink came from some pyjamas mum made me many years ago. I tested colour arrangements by colouring in the line drawing of the pattern. The whole thing is lined with the blue fleece for extra cosiness. I used up all the pink, all the black and most of the blue, making a noticeable increase in cupboard space.
Even though for the most part I treated the stretch fabric as if it was woven, I did use some of the techniques I learned in the stretch sewing class I did the week before. I used a stretch stitch and a stretch needle – I worked out which one to use by looking up ‘fleece’ in the Schmetz app. I decided not to hem the skirts; I just used the decorative topstitching to hold the layers together. I didn't do the decorative stitching through two layers on the bodice because that would have made it impossible to have the waist seam hidden inside the lining. Unfortunately, sewing through only one layer made the stitching a lot less stable because the fabric kept stretching.
Back when I was looking for a new sewing machine the thing that convinced me to buy this model (Brother NV610) was its ability to stitch sideways. I finally had a need for that feature on this coat because pivoting multiple layers of fleece around a needle is not particularly easy. I did use forward sewing for most of it but when it was just a few stitches to match up lines I was very glad of the sideways feature.

Within a week I had a new cosy coat. I think it looks strange but it achieves its purpose – which is to be cosy and warm.


*18th century coat, known in the vernacular as a pirate coat.

Sunday, 20 March 2016

Setting myself up to faille

I started a full-time job this year. In an office, like what real adults do. Thusly, I need some work clothes. Enter McCalls 7091. (I was quite taken with McCalls current pattern range, so expect to see a few of them gracing my blog in the not too distant future.)
This may have been meant to be an evening/party dress but I am chronically incapable of not being overdressed.
The pattern fitted me as is and I did not plan to make any alterations beyond using the sleeves from another view (and binding them, rather than hemming). For the skirt I found an embroidered fuchsia remnant that had been in the stash for years and bought some black faille for the outer shell and bodice lining.

Pressing the seams takes hours. There are 12 seams and each gets pressed from both sides, then pressed open from the back and the front. An ironing ham is very useful for this - the curved seams lie so much better on a curved surface. Once the seams are pressed you then get to zigzag 24 edges. Thankfully by that stage you have what looks like a nearly finished dress to feel accomplished about. At which point you can do it all over again with the lining.

I was surprised to see that the underskirt did not continue the panels from the bodice. Instead it consists of three slightly flared panels gathered at the waist. Once I put the lining together I was somewhat concerned by the bulk at the waist caused by the gathers and how the fabric was a bit more balloon-y than fold-y, even though it looked to me to be of a similar weight to the photo on the pattern envelope. Then I attached the layers together.
Gone are the smooth lines created by all those seams. Instead the skirt suddenly bumps into a ledge at just the point on my figure where a ledge should not be. So it looks like I will be changing the pattern after all.

Monday, 7 March 2016

Canberra Show Report

The Canberra Show happened last weekend and I entered as many sewing categories as I could.

On the Wednesday before, I got a rather exciting phone call to say I had won Overall Champion of the sewing section.
The costume that won was Eowyn, (construction posts here) entered in the 'Performance Costume' section. I was particularly pleased that this outfit was chosen as, while making it, I had begun to think my skills would never be good enough to do what I wanted. It was so nice to have other people judge that it was good enough.

I was invited to attend the opening of the Craft Exhibition to receive my prize which turned out to be a sewing machine and an over-locker, both Toyotas. Disturbingly, our two sewing machines have recently turned into five. I don't quite know what to think about that. I am excited to try an over-locker now. I also received a couple of Needlewitch vouchers which I will put to good use.

The special theme category this year was 'Retro'. This was very convenient given my sudden need to make 40s dresses at the end of last year. I won this category with my teal and peacock dress.

I also picked up a few other ribbons. In 'Any other article of machine or hand sewing' I won second place with my Viking costume.
I got second place in the 'Bustier' category with my black waist.
I entered my Regency Spencer in 'Winter/Summer Garments' and got second place.
My mum entered the sewing section for the first time this year and received second place in children's wear.
As you can see in the first photo, I wore another of my 40s dresses to the opening on Friday. I think my favourite thing about the day was the response it got. Several older ladies came up to me and told me it was just like a dress they used to have or had made. I was so pleased to hear that I had managed to make a historical dress that was recognisable to people who were there at the time. (This is not to say that winning Champion wasn't also great – I got the phone call on Wednesday, so it had been my favourite thing on that day. And also on Thursday.)

Friday, 29 January 2016

The great chain stitch

This is (I think) the last in my Bioshock-induced series of 1940s style dresses. The fabric is a lovely gabardine, the same type as I used for my Viking underdress. The peacock appliqué is a machine embroidery that I saw on the wall at Needlewitch and just had to use on something! In an alarmingly sensible course of events I found that it fit perfectly with something I was already planning to make. And it matches my historical inspiration.
Source
For this dress I redesigned the sleeve cuff on my pattern. While I do love the original peaked cuff I didn’t need all the dresses to be the same and I thought this change added a staid elegance to a dress that was a bit more formal than the others. The gold piping is made from crepe satin leftover from a Barbie costume I previously made.
The dress went together much as normal. Just in time I remembered to make sure the waistband seams matched across the zip. I felt a bit more pressure to be neat with this one, since the fabric was so plain that any mistakes would actually be visible. The sleeves, which had fitted reasonably smoothly on the other dresses, caused trouble here which I fixed by spreading the pleats over a longer part of the shoulder than I had before.
The appliqués were attached by hand. They were first tacked on and then stitched in gold, with the stitches matching the direction of the embroidery stitches.

Thursday, 31 December 2015

2015 Review

2015 began with a spur-of-the-moment Eowyn costume that turned into a crisis of collar-design and a drawn-out quest for The Right Trim. I said in an earlier post that I had been to every sewing shop in the ACT, but I have since discovered this was a gross slander of Needlewitch which I hadn't heard of then and which did have something that would have worked.
For the Jane Austen Festival I wanted to make a couple of evening gowns but I found myself in need of a new pair of stays which dashed my plans to be ready early this year. I managed to get my Joker-inspired regency dress wearable for the ball and finished it afterwards. At JAFA I did an 1806 bonnet class where I made a Polish Casquette (using a Lynn McMasters Pattern). Later in the year I made a spencer which is now ready early for next year.
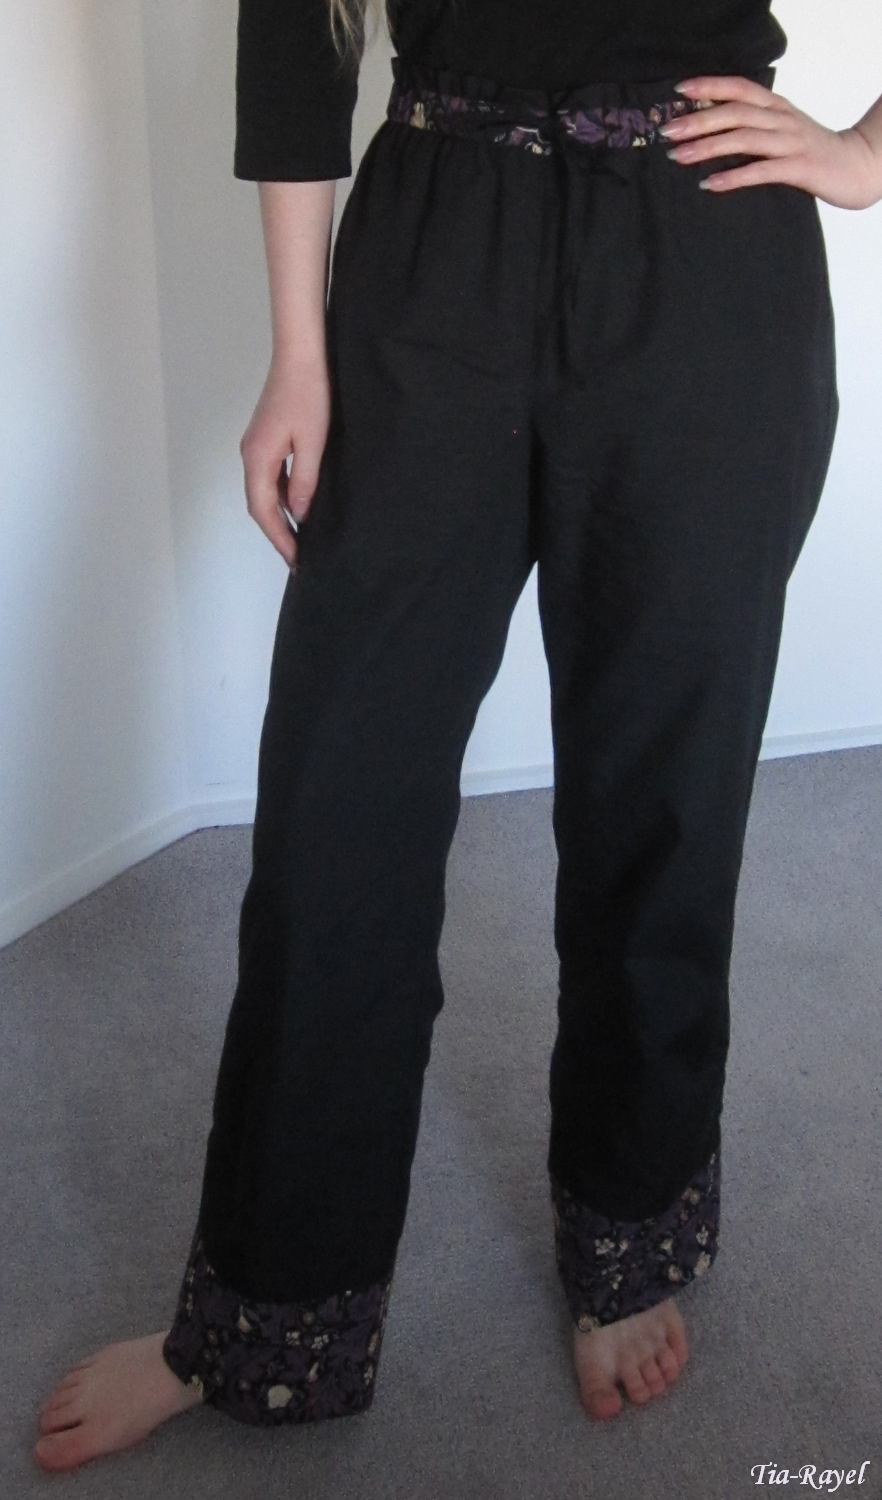
 I made a pair of pyjama pants (Kwik Sew 3882) as part of sewing lessons.
I played through the Bioshock series of video games this year which I loved. This inadvertently solved my “I can’t find any clothes I like in the shop” problem as I suddenly wanted to wear 1940s style dresses - and these proved surprisingly simple to make. I created a pattern with a number of variations and kept making new dresses. I was glad to have simple, quick projects as I spent the last half of the semester alternating between being sick and madly trying to catch up on uni and I needed something to relax with. Most of these dresses happened between 9pm and 3am at the point where if I didn't sew something I would go mad. Here are the individual blog posts: maroon, light blue, navy blue and teal.

Finally, here is the progress on my Bayeux tapestry dress. This year I finished the Church and these horses. Filling in the horses takes so much thread (and time).
In non-sewing news: I am finally finished with Uni! This year I completed a double degree in History and IT. (All together now: "That's an interesting combination!")

This is my tenth year of making costumes. And having come as far as I think I can under my own tutelage I started having lessons and they've been great. I now press and finish seams better; I use notches; I use a whole variety of new and different tools; I know how to treat my sewing machine better...

Speaking of sewing machines: I got a new one this year. My 1976 Husqvarna 2000, inherited from my Great Aunt, finally gave out after a long and full life. I now have a Brother NV610 which, so far, I am pleased with.

There were other changes to my sewing arrangements this year. We rearranged the house a bit so I now have a sewing-only sewing room far enough away from everyone else that I can sew late into the night whenever the insomnia takes me. We reorganised the pattern stash to be more accessible. My mum and I swapped sewing cabinets too. So basically my sewing setup now is all of the new. And I got a garment steamer. I love my garment steamer.

This was a year of plans that did not eventuate, starting with Eowyn taking two months longer than it was meant to. I was not planning to be sick all the time either. It wasn't anything serious but the time-out being sick followed by catching up on study really threw the last five months for me. There were several months this year which I pretty much slept through. When I finally had a chance to look seriously at the hardware for my Assassin's Creed costume I found that the method I was expecting to use wouldn't work. I had been planning to use draw slides for the hidden blades but the only ones I could find were nearly as big as my wrist and really heavy.  And finally, I posted a list of my future plans of which I have worked on exactly none. (Usually I don't publish 'goal lists' because I know how many dresses I think about and don't make.) Of course, I immediately went off and made four other dresses not on the list. All or none of my plans may be realised next year.

Saturday, 26 December 2015

A moving story

When I was working on my 1940s dresses  I did a lot of the work in the small hours of the morning. This was not so well received because the noise disturbed the other occupants of the house who for some reason like to sleep then. This prompted a decision to move the sewing room post-haste.

We decided to get rid of the table. I think its intended purpose was for cutting out patterns on but its actual use was mostly to have things put on it or under it. It wasn’t a good height for sewing work and I now have a glass table to use for tracing so I mostly use that if I need a table. The sewing room also doubled [tripled] as a dressing room (which meant I couldn’t store things in the built in wardrobe) and an art room. One of the sewing cupboards lived in the spare bedroom which meant a trip down the hallway whenever buttons or zips or patterns were needed. (Most of the patterns made it to the sewing room earlier in the year but not all of them.)

Mum is an experienced house rearranger so she made up a floor plan with movable furniture and we experimented with possible solutions before embarking on the big move.
First, the table went. It had a good life but some of the veneer had snapped recently and its usefulness was limited.
The spare bedroom was a very crowded room. As well as the bed and desk it stored my costumes and a sewing tools cupboard that didn't fit in the sewing room. The new spare bedroom is a larger room which gives guests more space to move. My bonnets and hats are displayed on the shelves and my costumes now have covers to protect them from dust and light.

The sewing room is now ONLY for sewing. THIS IS SO EXCITING. Let’s tour...

My sewing cabinet and dress form.
The stand the dress is hanging from used to support a birdcage but turns out to make an excellent hanging rack for garments in-progress or being steamed.

The ironing stand holds the iron (duh), ironing ham, sleeve roll, pressing cloth, ironing spray and garment steamer. The steamer was a birthday present and I love it. Haven’t ironed a thing since (I have pressed a lot of seams though).
Next are the notions drawers, scrap fabric boxes and mum’s sewing cabinet. We don’t sew at the same time as much as we’d like but I think we have a better chance of both fitting in the same room now. The drawers used to be behind the open door of my sewing cabinet meaning I couldn’t easily access things while I was sewing so I’m very pleased it’s been shifted.
The brown cupboard has more notions and tools. There’s a nook for in-progress projects bags next to the pattern boxes. Having the boxes stacked on top of each other is not as convenient as lining them up on a table but they are small enough to not be too hard to access. Finally, the fabric cupboard. I would like to do some stashbusting over summer (ha ha, ha) so I can fill this cupboard with a stash of useful lengths. I often want to ‘make something now’ but don’t have enough of any particular fabric.

The new room is great. No more worrying about keeping people awake; no more having to share the space for other uses; less sun in the heat of the afternoon. I don't know why we didn't think of this sooner.

Tuesday, 22 December 2015

Middle [school] ages


In a year 9 history elective my class decided to have a medieval lunch. Due to my internet-ly wanderings at that time I had just discovered the concept of ‘historical accuracy’. I decided I wanted an accurate costume and couldn’t possibly wear the supposedly ‘medieval’ hot pink satin ‘frog princess’ costume my mother had previously made for me to wear to a birthday party.
Frog Princess
So I sought out a pattern for a sideless surcoat outfit (Burda 7977), bought some cotton poplin and embarked on the project. At the time it seemed like such a huge project. I had a week to make it – but it was a week when we were out every night.  Fortunately it’s not a complex outfit and I was able to follow the pattern as is (a very rare occurrence). Only the godets caused some grief. Godets were a new concept at the time for both myself and my mum and I had to redo them several times. Now I know to sew them differently from the pattern instructions (one should attach godets before sewing the side seams).
The outfit was ready to wear on the day, albeit unhemmed; Mum made the hat while I was at school and dropped it off just before lunch. 

This was my first attempt at a deliberate, accurate costume and I have never looked back.

This costume has since been worn to birthday parties and medieval festivals and has been a visual aid in class presentations. I’ve grown so used to it that it has migrated out of my costume wardrobe to be mixed-and-matched with my everyday wardrobe. 
Of course this is perfectly normal uni wear.  What do you mean it’s 700 years out of fashion?
I have since accumulated quite a collection of early medieval cotton garments. I made outfits for the doctor and lady-in-waiting for a scene from Macbeth in English class (I do that). These are both essentially lengthened t-shirts. I tried to use trims that looked like weaving if you squinted at them from a distance, and the one on the brown robe kind-of does. Lady Macbeth wore the cream dress (above) without the surcoat.
More recently I used the Burda 7977 pattern to make an everyday dress. I adapted the sleeve pattern into bell sleeves and I was very happy with how they turned out. This pattern has surprisingly agreeable sleeves and I use them when I have to add long sleeves to other patterns.