Monday, 24 June 2013

Ice Goth


When I was researching Goth fashion for my Misery costume I came across a style of outfit called ‘Ice Goth’.  Basically, the garments are Goth in style but in all white, rather than all black. I liked the idea of this, so when I was trialling the Simplicity 2172 corset pattern I made a white corset to build an Ice Goth outfit around.


The corset has a brushed cotton lining, a layer of coutil and a layer of lace. The boning channels are sewn through all three layers (to help secure the lace), with the bones in between the lining and the coutil.
The corset is trimmed with some gathered tulle and a jewel at the top.
The most important aspect of this outfit is texture. I’ve generally found white dresses to be quite boring. So instead of having interesting colours I made sure this outfit had lots of interesting textures, both physical and visual. Hence the lace and the tulle.

Over the next few months I collected interesting white fabric whenever I saw it. This wasn’t going to be a huge dress, so I could make do with a meter or two of each fabric. And as the collecting period included Christmas, I made it known that bits of white fabric would be a good present. I did have a silhouette in mind, but mostly I let my design be suggested by the fabric I accumulated.

My final design had six parts: the corset, 3 skirt layers and the sleeves as two separate pieces each.
 

The outer layer of skirt is a combination of bustle and apron drapery. The fabric is a dotted fleece my aunt gave me; it was so nice I wanted it to be featured. I hand-draped the bustle shape and pinned it together on the dress form. I hand sewed the fabric at various points on the underside to tape that was secured at the waist band. The apron is gathered to the bustle on one side and to itself on the other. Both are sewn to a waistband that opens and fastens at the side.


The waistband had to have a V-shape at the back so the bustle could come up to the V-shaped corset, meeting it but not tucking under it.


The inner skirt is a two-layer handkerchief skirt. At Patchwork on Parker I found two white-on-white floral prints, one large and one small. I made a square skirt out of each (the bottom one slightly longer) layered them diagonally and put them on an elasticised waistband.


In between the skirt and bustle is a satin layer. It is a rectangle of satin trimmed with lace on one side and along the bottom hem. The other side is edged with a pleated fabric and a length of feather-wool finger-weaving. The fabric that has been pleated is embroidered with paisley designs and is one of the more expensive ones I used, so I only had a small amount.


I was introduced to finger-weaving in early primary school as an exercise to strengthen my fingers and improve my hand-writing. Using normal wool, finger-weaving creates a type of plait, but with feather-wool you get a thin fur-boa like braid.  I used this several years ago in another project and had loads left over so I was pleased to find this additional use for it.

The satin layer is hitched up semi-randomly at a number of places where it is gathered and secured by a jewelled bar.  The bars came from a bracelet which I bought while I was gathering the white fabrics, not to wear, but to use the pieces as embellishments.


The top sleeve piece is made of a crinkled lace. It is constructed as a tube with hemmed elastic at each end. The lower sleeves are the first free-standing cuffs I made. I wanted something that looked like spats for the arm. The fabric has drawn thread stripes in it and the buttons were accumulated over several years of sorting through the button bin at Addicted to Fabric. I decided that cuffs make great accessories and have since made several more pairs for other outfits.
    

I began working on this outfit for its own sake (I think I described it as an ‘exercise in design’). When I wasn’t able to make the outfit I had planned for my 21st birthday party (as I was unable to find appropriate fabric) ended up wearing this outfit instead, because it also fit the party’s theme - Extravagance. 


I accessorised mostly with black: jewellery, hair flowers and shoes. For makeup I used white eyeshadow over my whole face as a base. It doesn’t look great in the photos because I could not find a matte white eye shadow anywhere, and the ‘pearlescence’ doesn’t agree with the flash. My mum drew white eyeliner curlicues around my eyes (which according to some is a goth faux par – but I like it) and I wore plain white feather false eye-lashes (another difficult find). The feather lashes had been one of the earliest inspiration ideas I had for this outfit, but I had never worn any sort of false lash before, so working out how to put them on was the last task before the party. My mum did my hair (thanks mum, it looked great).


Saturday, 13 April 2013

Because every so often, I have an absurd idea

At the end of last year, pretty much out of the blue, I developed an interest in the English Middle Ages - roughly, from the Norman Conquest to the end of the Wars of the Roses. I have always been interested in history, but what era I find most fascinating changes from time to time. (I suspect this current change may have been slightly influenced with the fact that I was supposed to be writing an essay on the 18th Century at the time.) Anyway, because of this I decided it would be a great idea to embroider excerpts from the Bayeux Tapestry on to a dress. (If anyone is wondering, the Bayeux Tapestry is an embroidery, not a tapestry.) This project would also give me an endless supply of hand sewing to do, an occupation I pine after when I don’t have any.

The base dress is made from McCall’s 3129, which is quickly become my standard base pattern. It closes with the best invisible zip I’ve done yet – I didn’t need to redo any of it. The easy-to-embroider fabric was another great find at Patchwork on Parker in Cootamundra. I didn’t try to match the embroidery floss colour perfectly to the actual tapestry (and frankly, when you’re working with photos and photos of photos – colour accuracy pretty much goes out the window anyway). Instead I found out what the colours were by name, and then found a collection that looked good together.
The pale yellow is perhaps a bit too close to the fabric colour 
To transfer the design on to the dress, I printed out pictures in the size I wanted and traced the outline in dark pen. I then placed the tracings over the inside of the dress until I was happy with the arrangement and then traced them. I work on a glass top table with a lamp underneath to shine the designs outlines through the fabric for tracing. I have found that this process is better at night when the only light source is the lamp.


 The figures are outlined in stem stitch (which I no longer forget how to do in the middle of a row) and filled in with Bayeux stitch. Bayeux stitch is the stitch that was used on the original tapestry. It conserves thread as much as possible and fills in spaces very quickly.

I expect that this project will take a while (read: years).  I am not constantly embroidering but I am happy with my progress after a month.

May I present the first figure, finished:


There is a painfully detailed set of progress photos under the cut, that I expect I am the only person who will care about.

Monday, 1 April 2013

Hollywood Glamour


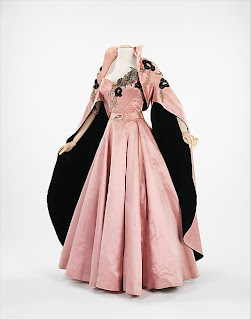
One of my friends had a ‘Hollywood Glamour’ themed 21st birthday party last year. This seemed to me to be the perfect opportunity to make this dress, for which I had been making vague plans ever since seeing it in High Style. Then I discovered it was worn by Ava Gardner in The Barefoot Contessa, in which she played an actress – how appropriate! I decided not to to make an exact copy as I don’t particularly like strapless sweetheart necklines and that decision also gave me a lot more freedom reinterpret other elements, such as the appliqués and the colour.  As it turned out I couldn’t find the fabric in light pink and I very much like the colour of the fabric I found.

This is the inspiration dress, held by the The Metropolitan Museum of Art
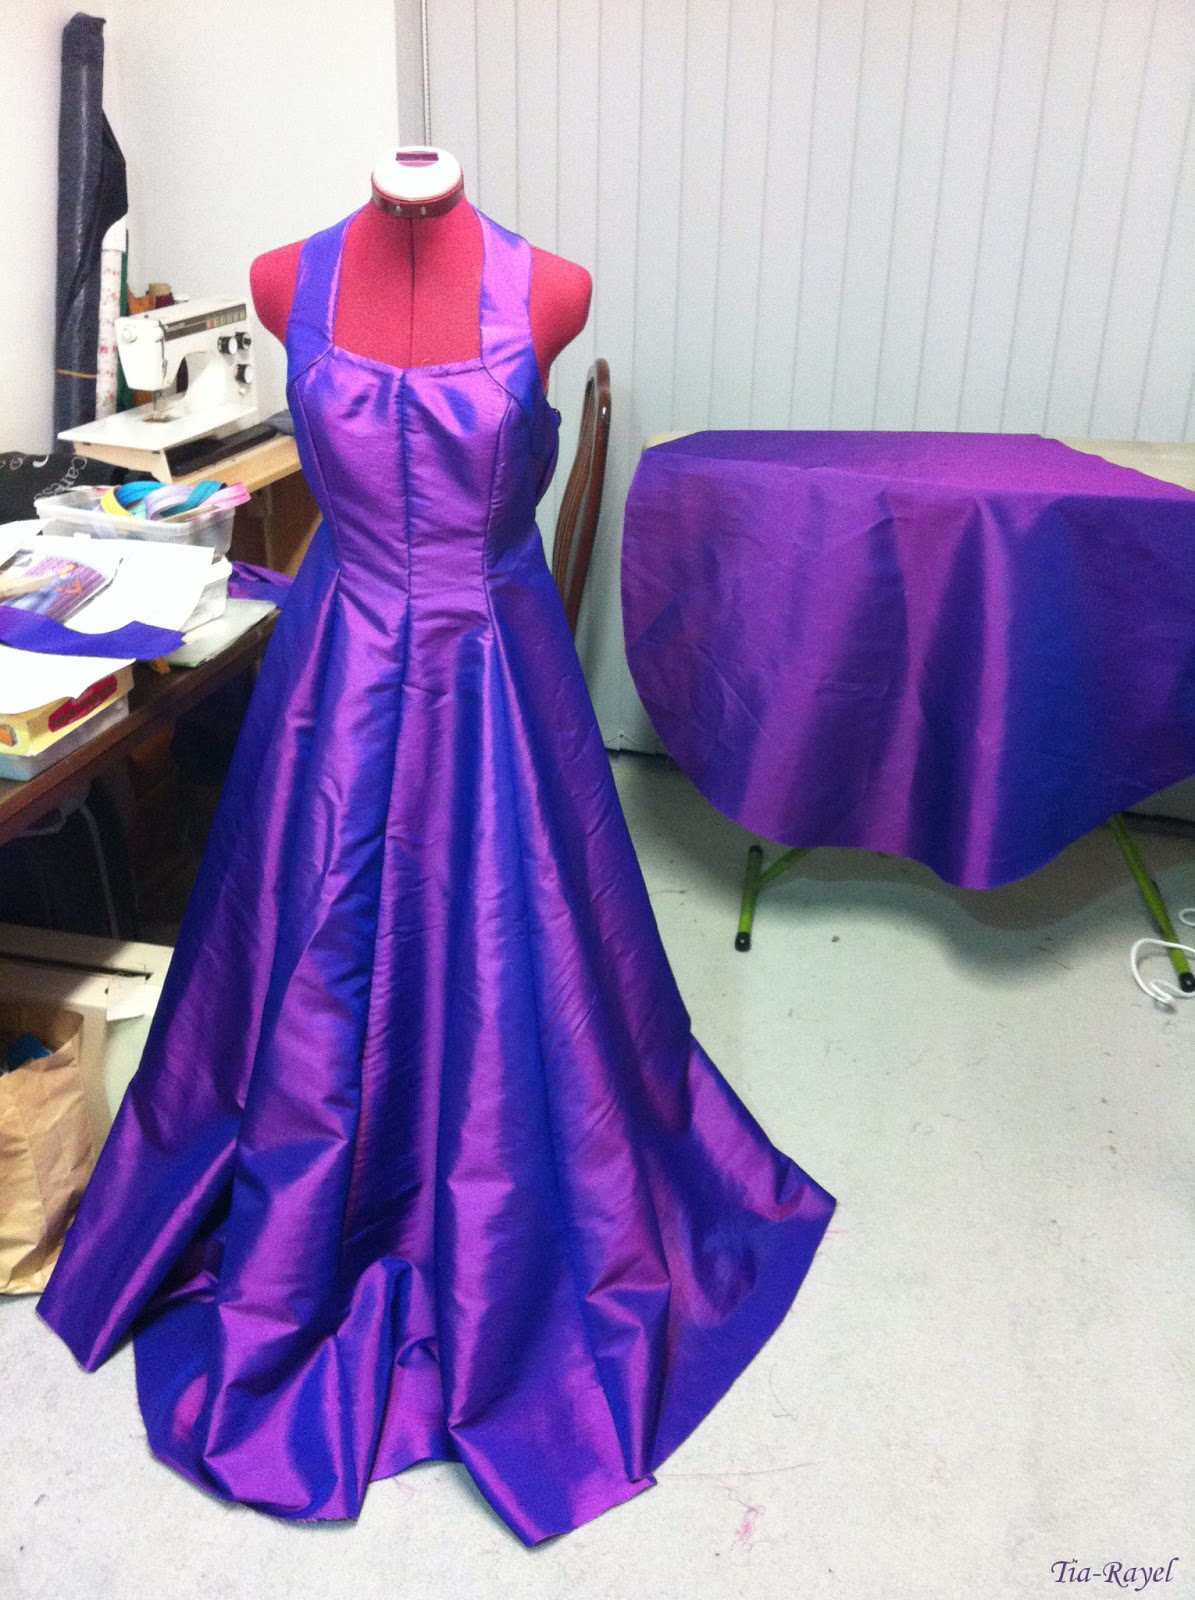
The dress is made from nine metres of poly-taffeta and three metres of velvet. I had never worked with real velvet before and it took me a while to get used to how it pushes away when sewing a seam, but the good quality just adds so much class to the outfit. The lace appliqués were cut from a lace fabric. It was the sort of fabric that, at $70 per metre, makes either a very expensive dress or in small amounts, very cheap trim – 20cm gave me 18 lovely appliqués at less than a dollar each.
 (the fabric on the ironing board is a sleeve)
To make the dress I adapted Vogue 2903 (a vintage 50s pattern) and used Simplicity 2442  as the basis for the halter. The dress closes with an invisible zip at centre back and the halter just goes over my head. The bolero was also adapted from Simplicity 2442. I cut the mock-up with a lot of extra fabric around the collar and cut it back until it looked how I wanted. I then forgot to interface the collar, but the fabric works well enough without it. For the sleeves I cut the shape of a sleeve top into a sheet, sewed it into the mock-up, put the mock-up on my dress form and cut the rest of the material to the desired shape.
The sleeve pattern, with an iPhone for scale (it’s huge)
 I free-handed the shape for the velvet appliqués and, after ironing them on, machine satin-stitched around them. The lace appliqués were also first affixed by an iron-on adhesive and then secured by hand. They took around two hours each, because I had to be very careful to sew through the loops of the lace weave.

In the grand tradition of costuming, the dress was still being sewn right to the last minute and I wore it to the party with the sleeve linings safety-pinned in, one of the appliqués only ironed on and not sewn and no appliqué on the front bodice. But it was still very well received and I loved wearing it.

Look! I made something neat on the inside.
I did the velvet on the bodice appliqué differently from the ones on the bolero. I satin-stitched the velvet to a separate piece of taffeta which I hand-sewed to the bodice preventing any misshaping and keeping the inside cleaner. The bodice appliqués are all beaded and sequined which looks really nice (I didn’t have time to even consider beading on the bolero) and was so much fun that I spent the rest of the week wishing I had more to do.


I entered this dress in the Canberra Show. I won first place in my section and reserve champion (for non-professional entrants with more than 2 years experience).

I am incredibly happy with this outfit. It’s one of the best quality pieces I’ve made and it was really nice to have a dress that I’d long admired, but had no particular expectations that it would become a reality.


 (It's a great dress for pretending to be a helicopter)

Monday, 11 March 2013

Happy Centenary Canberra

On display in the Celebrating the Centenary of Canberra section of the Canberra Show

It has been one hundred years since Canberra was named as the Capital of Australia. Publicity for this anniversary started a few years ago and I thought it would be good to make a dress from 1913 to go along with it. With the anniversary of the Titanic happening the year before, there were many resources online for this period, but I kept finding that teens-era dresses just didn’t appeal to me. So I decided to make a historically significant dress rather than a generic outfit from the era. At Canberra’s foundation ceremony the new city’s name was announced by Lady Denman, the Governor General’s wife. According to a newspaper report of the event she was wearing “a striking dress of green and white, and with a black hat trimmed with a white ostrich feather”. This would be my project.

To research Lady Denman’s dress I looked at photos held by the National Archive and some footage of the event. The footage was really useful to see how the dress moved, and I could take screenshots of the back.

It has been quite weird working on ‘Lady Denman’s’ dress. ‘Lady Denman’ is a phrase many Canberrans are familiar with – we travel on ‘Lady Denman Drive’ regularly but I previously had no idea who she actually was. Now, in my head, the term has been re-assigned from ‘street name’ to ‘historical-person-in-dress’ and I do a double take whenever I hear or see it.

I started with underpinnings. The corset is made from the pattern in Corsets and Crinolines. Though I didn’t make my corset exactly the same way, I found the 1911 corset Sew Along at Bridges on the Body to be a helpful reference point. This was the first time I’ve done flossing on a corset. It isn’t great, but it’s a start.


When researching petticoats I found it difficult to work out how many and what sort were worn during this era. To go with my outfit I made a princess line slip. It is my own design interpretation taking note of extant garments, period advertisements and other recreations. After scouring Canberra for two-edged lace I taught myself lace insertion using this excellent tutorial. It was easier than I expected and I think it looks very effective – I want to do more of it.

I used mother-of pearl buttons I inherited from my Great Aunt
To research how to construct the dress I arranged a visit to view some dresses in storage at the Powerhouse Museum in Sydney.  I’m very thankful to Glynis and the Museum for their help. This was a very useful exercise as I found there were a variety of methods used at the time. I chose to use a fitted bodice under the pigeon-fronted crossover bodice and I based my skirt construction on one of the Museum’s dresses from the period which had central rectangular panels and shaped sides.


My dress is made from green satin and white lace. I couldn’t determine the shade of the satin as all the photos of Lady Denman are in black and white, so I chose a colour that was also used in one of the Powerhouse Museum’s dresses – so I know that I at least have a colour that was used at the time. Sadly, I couldn’t find any lace that had quite the same type of floral pattern as the original dress, so I tried to find a lace that was most closely reminiscent of the fabric shown in the photograph.

The sleeves and lace overskirt are edged in satin. The satin is decorated with a row of bullion stitch. This sort of broken-line edging on the hem was a common feature on the dresses of the period held by the Powerhouse Museum.
Hand-sewing the bullion stitch hem decoration

The hardest part of the dress to work out was the back. In the video there is clearly something flapping around the back of the sleeves, but it is hard to tell what. It seemed to be a loose blouson overlay in the lace fabric. Using this method produced a result that looked the same as the photographs.

This dress was a very interesting research exercise to do. Researching from extant dresses, guided by a curator’s expertise, gave me a level of detail I couldn’t have got from just photos or patterns.  Working from low detail pictures of the actual dress was a challenge - it’s difficult to replicate something when you can’t see it clearly enough to be certain how it was made.


Friday, 8 March 2013

Embroidery


This is my new project that I will be making a start on this weekend:


More later...